Hi all,
Not trying to start another RAW vs Jpeg debate here. We all know the advantages shooting RAW has over Jpeg.
However, as an amateur shooting solely for my and others pleasure I'm having more and more photos mostly stuck imported to my Lightroom and never getting out of it as I don't have the time to edit them and unedited RAWs rarely look better than in camera Jpegs. Currently I shoot only RAW and was trying to find a way for creating a "decent looking" or as in camera looking Jpegs conveniently and quickly. I've tried to using the Sync in LR for multiple photos with similar shooting conditions, but most of the Sync'd photos just don't look good enough and need re-tweaking anyway.
I know I can shoot both RAW+Jpeg and only edit the best photos from RAW while publishing the rest quickly. Maybe I will do it eventually, but it seems to be really cumbersome and taking a lot of space on card while shooting and quite some time and mess in LR while trying to separate the Jpegs from RAWs (maybe I'm doing it wrong though).
I guess a lot of us encountered the same problem with "volume shooting" and was wondering is there an easier way in LR (or maybe DPP which I never used before) just to push a button and get these "camera like" Jpegs without hassling around to much.
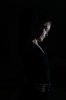
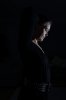
Please help me set my photos free") !
!
Thanks!
Not trying to start another RAW vs Jpeg debate here. We all know the advantages shooting RAW has over Jpeg.
However, as an amateur shooting solely for my and others pleasure I'm having more and more photos mostly stuck imported to my Lightroom and never getting out of it as I don't have the time to edit them and unedited RAWs rarely look better than in camera Jpegs. Currently I shoot only RAW and was trying to find a way for creating a "decent looking" or as in camera looking Jpegs conveniently and quickly. I've tried to using the Sync in LR for multiple photos with similar shooting conditions, but most of the Sync'd photos just don't look good enough and need re-tweaking anyway.
I know I can shoot both RAW+Jpeg and only edit the best photos from RAW while publishing the rest quickly. Maybe I will do it eventually, but it seems to be really cumbersome and taking a lot of space on card while shooting and quite some time and mess in LR while trying to separate the Jpegs from RAWs (maybe I'm doing it wrong though).
I guess a lot of us encountered the same problem with "volume shooting" and was wondering is there an easier way in LR (or maybe DPP which I never used before) just to push a button and get these "camera like" Jpegs without hassling around to much.
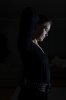
Please help me set my photos free
!Thanks!