Merging Multiple Exposures

Hi All,

Let's get a discussion going about techniques for merging multiple exposures. I'll share mine that I use for indoor real estate photography:

Generally I shoot five exposures that I feel I might need but usually end up needing only four after post processing. Starting with the brightest exposure as the background, I'll post process the next darkest exposure and paste it in the layer above, repeat until all images are in separate layers in one PS file. I'll work through each layer using masking, dodge, burn and opacity effects. Photoshop CC added a "Camera Raw Filter" which is a huge help for lifting shadows and adjusting color temps after you've converted out of RAW.

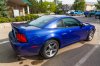
Regardless of your lighting or your DR, there are times where it's impossible to capture the image in one exposure. Such a home I have attached as an example. The interior has almost no discernible lighting during the day, dark woods and stones throughout, etc. with a bright, beautiful view.

What techniques do you use? Do you have software automate the process, or do you manually merge your exposures?
 

Attachments

  • Multiple Exposure.jpg
    Multiple Exposure.jpg
    247.9 KB · Views: 728
Hi All
What a great idea, and the first subject is exactly what I need, creating merged Architecture/Design photos of areas with interior and exterior lighting.
As a suggestion, could you please give more detailed information for me as a very new PS user.
eg
How do I make the brightest exposure the background, [where in the PS menu], how do I then paste the next darkest in the layer above, and how do I generate the final merged picture?

To an experienced user these may seem simple but I am just starting and would really appreciate an almost "monkey see, monkey do" set of instructions that would enable me to achieve the excellent result that you have shown us all.

Regards
Michael
 
Upvote 0

dppaskewitz

CR Pro
Jul 19, 2011
186
9
76
Mt Spokane Photography said:
Nice work, but, as a photographer, it does not look real. It reminds me of TV shows where they green screen a outdoor scene or a person doing weather. Something in my brain sees it and says its not real.

Please don't take offense, I referring to the process in general, not to your specific work

I agree it doesn't necessarily look "natural," but I think for the purpose (which I take to be showing both interior and view in a single image to sell real estate) the technique provides a great result.

My innocent question: how much different would the final result look if done in something like Photomatix and selecting the "natural" profile? I ask because I have used Photomatix and have, on occasion, achieved OK results. Wondering if it would be worthwhile to up my game by learning the procedure you describe in PS CC (like Michael, I am pretty new to PS and would love a step by step).
 
Upvote 0
Jim Saunders said:
My workflow: Adjust all the images in LR5, merge to HDR pro in CS6, 32 bit mode, set white as appropriate, render that, close it (yes to saving), mess with resultant file as it appears back in LR. One is attached.

Jim

This is what I normally do. I used to use an ND grad for scenes that included bright sky/cloud, now I only do the exposure blending in PS as described by Jim.
 
Upvote 0

Besisika

How can you stand out, if you do like evrybdy else
Mar 25, 2014
779
215
Montreal
Mt Spokane Photography said:
Nice work, but, as a photographer, it does not look real. It reminds me of TV shows where they green screen a outdoor scene or a person doing weather. Something in my brain sees it and says its not real.
Please don't take offense, I referring to the process in general, not to your specific work
Since when photography is real? It is an art, at least in my mind. And beauty is in the eyes of the beholder. I thought the idea is to impress your followers and in this scenario I am one of them. I like it. What I like is the ability to tweak it to my taste.
If I understood it, you use a brush a lot. This allows you to save it at different stages so that you could return back anytime to tweack it more (layer comps for example). It allows you to create multiple versions as well, so that you could show it to your critiques (or client) for them to choose.
In this scenario, you would have created more and less "real" or "natural" versions.
I admit, it is good to have an alternative like Jim shows, in case you need it faster.
I don't do architecture but I see some uses in what I do.
Thanks for the tip.
 
Upvote 0

m

Nov 24, 2012
204
0
JM Photography said:
Generally I shoot five exposures that I feel I might need but usually end up needing only four after post processing. Starting with the brightest exposure as the background, I'll post process the next darkest exposure and paste it in the layer above, repeat until all images are in separate layers in one PS file. I'll work through each layer using masking, dodge, burn and opacity effects. Photoshop CC added a "Camera Raw Filter" which is a huge help for lifting shadows and adjusting color temps after you've converted out of RAW.

It sounds like you are adding each exposure/layer individually.
You can open multiple raw files as layers in Photoshop. (select them all, then "open as layers" or something similar)
It should open ACR to process them (all at once).
If I remember correctly, since some version you should be able to make the ACR adjustments "smart" (@somebody who actually has PS: please elaborate on that) so that you can adjust them later.

Maybe this saves you some time. :)

However, I'm also all in on the 32bit HDR workflow.
I feel like it's what HDR is supposed to be: a way to extend the dynamic range of your images, nothing more, nothing less.

There was a great thread with plenty of information on HDR software a while back:
http://www.canonrumors.com/forum/index.php?topic=11859.0

As your original workflow involves going through each layer there's another way to shoot architecture, but this time each exposure varies by using flash:
https://www.youtube.com/watch?v=1yEtc-YNT1I

I never tried that before, but the house you photographed in your first post looks kind of fancy, so this might be worth considering.
 
Upvote 0
Mar 1, 2012
801
17
Off topic already here, sort of.

One solution to balancing the far different light levels between the bright outside and the comparatively dark interior is a simple Strobist technique.

On full manual (using live view if you have it) expose for the bright exterior, then bounce a flash (or more for a large interior) on ETTL, done.
And all done in camera, no layering needed.
---
We now return this thread back to it's original "Merging" topic.
 
Upvote 0
I disagree with the notion, art or not, that HDR photography does not look real. If you buy the notion that we as photographers try to capture what we see, then HDR, while still not as broad as our eyes see, is much closer to what we see than simple "real" LDR images. The photo of the inside of the home illustrates this point perfectly. For most of us, when we make the shift visually from the inside of the room to the sea outside, we do not have a massive shift in contrast in that move; our eyes are able to adjust back and forth seamlessly. We "see" in HDR. HDR in PS or any of the other software tools merely tries to emulate reality for us.
 
Upvote 0

Besisika

How can you stand out, if you do like evrybdy else
Mar 25, 2014
779
215
Montreal
tculotta said:
I disagree with the notion, art or not, that HDR photography does not look real. If you buy the notion that we as photographers try to capture what we see, then HDR, while still not as broad as our eyes see, is much closer to what we see than simple "real" LDR images. The photo of the inside of the home illustrates this point perfectly. For most of us, when we make the shift visually from the inside of the room to the sea outside, we do not have a massive shift in contrast in that move; our eyes are able to adjust back and forth seamlessly. We "see" in HDR. HDR in PS or any of the other software tools merely tries to emulate reality for us.
Interesting point of view (and good explanation)!
I admit, after I did a laser treatment, for few days, my eyes had trouble adjusting and took a minute or so to do it. Now I can describe it in technical words; I was temporarily in "LDR mode".
 
Upvote 0
JM, that's a nice example, though I'm jealous of the person who gets to live in that house! I agree on the need for HDR in interior shots and use a similar technique. I use Topaz Labs ReMask to speed up my layers, but beyond that, the luminosity masks are my primary tool. So far, I still haven't found a HDR tool that I'm happy with - the ghosting, ringing, oversaturated colors, and stunted shadows just don't work for me. I realize others are able to achieve good results with some of the tools, but I get better results on my onw.

For landscapes, I like to use digital ND grads, primarily because I don't like the flare I usually get with traditional ND grads. For a photo like the one below, I process each photo at the same time (click select both in DxO/ACR) so the settings match, and then tweak the brightness a bit individually. In PS, I simply load them into separate layers and use the grad tool to create a layer mask. I blend them together trying to balance realism (as in what I saw with my eyes) with effect. The critical part of these shots is making sure the sky is lighter than the reflection in the water. The tools tend to balance the two, which isn't realistic.

St_Marks_NWR_5-31-2014_7190%2B7192_ID-L.jpg
 
Upvote 0
Some good discussion here! It's always interesting to see the different ways people achieve similar results through post processing, and as others noted there are many ways to go about it. I'm a pretty old school Photshopper who is marveled by the things you can do today, and tend to take a more archaic approach when making edits.

As m noted, you can batch process into multiple layers. You can also edit as smart objects. Both of these methods are better than my current workflow.

I agree with tculotta:

tculotta said:
I disagree with the notion, art or not, that HDR photography does not look real. If you buy the notion that we as photographers try to capture what we see, then HDR, while still not as broad as our eyes see, is much closer to what we see than simple "real" LDR images. The photo of the inside of the home illustrates this point perfectly. For most of us, when we make the shift visually from the inside of the room to the sea outside, we do not have a massive shift in contrast in that move; our eyes are able to adjust back and forth seamlessly. We "see" in HDR. HDR in PS or any of the other software tools merely tries to emulate reality for us.

In my work, I best try to reproduce what I see with my own eyes when I capture the photograph. Whether the best technique is HDR processing or multiple exposures merged, that's debatable and up to the artist.

You also have to look at what the client likes and cater to their taste as they write the checks. Many of the Japanese magazine companies we work with do not believe in editing for what your eyes see, and prefer to publish what the camera captures with almost no post processing. While our market in Hawaii, real estate agents seem to prefer slightly over saturated images, overly bright living spaces, etc.

mackguyver said:
JM, that's a nice example, though I'm jealous of the person who gets to live in that house! I agree on the need for HDR in interior shots and use a similar technique. I use Topaz Labs ReMask to speed up my layers, but beyond that, the luminosity masks are my primary tool. So far, I still haven't found a HDR tool that I'm happy with - the ghosting, ringing, oversaturated colors, and stunted shadows just don't work for me. I realize others are able to achieve good results with some of the tools, but I get better results on my onw.

For landscapes, I like to use digital ND grads, primarily because I don't like the flare I usually get with traditional ND grads. For a photo like the one below, I process each photo at the same time (click select both in DxO/ACR) so the settings match, and then tweak the brightness a bit individually. In PS, I simply load them into separate layers and use the grad tool to create a layer mask. I blend them together trying to balance realism (as in what I saw with my eyes) with effect. The critical part of these shots is making sure the sky is lighter than the reflection in the water. The tools tend to balance the two, which isn't realistic.

St_Marks_NWR_5-31-2014_7190%2B7192_ID-L.jpg

Thanks for the landscape tip. Since I shoot exclusively with the 14mm, filters are not really viable. This is a great example of a digital alternative through post processing, with technique not too dissimilar from what I do now.
 
Upvote 0
JM Photography said:
Thanks for the landscape tip. Since I shoot exclusively with the 14mm, filters are not really viable. This is a great example of a digital alternative through post processing, with technique not too dissimilar from what I do now.
No problem and this was taken with the TS-E 17, so I'm in a similar boat in terms of filters. I might get the WonderPana system someday, but I think the money is better spent on other things at the moment.
 
Upvote 0
Jan 29, 2011
10,673
6,120
One thing the original image shows up is the way shadows adopt a very cold colour, I have taken to desaturating the blue out of the shadows and then lifting them with a masked colour filter layer.

I really like the Wonderpana for my 17TS-E, but the truth is with so much bracketing I really only use it for reflection controls with the CPL, everything from swimming pool water, to granite kitchen surfaces and wooden floors all often benefit from the use of the CPL.
 
Upvote 0
Mike Kelley is an architectural photographer who has produced a great video series about shooting interiors (and twilight exteriors). He resists the temptation to "cut in" a perfectly exposed exterior. He recommends letting the windows blow out just a little to retain a natural appearance. On a bright day like the one you shot, the outside is naturally going to be brighter than the interior. Our eye expects it.

Another trick he uses is to use flash to expose the window frame so it doesn't become weirdly dark as you expose for the exterior. I can provide more detail if you're interested.
 
Upvote 0