M
Marquis
Guest
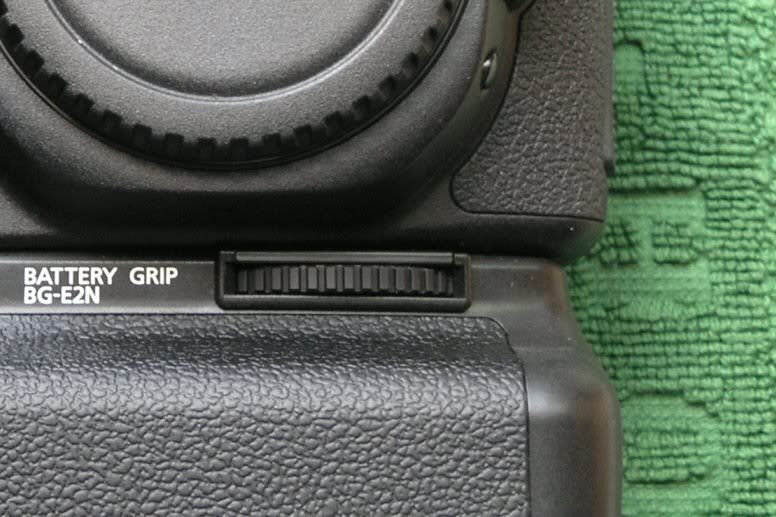
Recently while using a BG-E2N battery grip on a 50D I had a problem removing it, the wheel would turn but the grip would not budge. 
It would seem that over time I had been over tightening the dial lock and had manage to strip the plastic gears from it. :-[
I did a search on the net and found it to be a common problem with canon grips, although information on getting the grip off was not so common.....
The following is break down of how I got it off and repaired for minimal costs
Disclaimer: this article is only intended for general information purposes only and does not constitute advice or substitute advice of an appropriately qualified professional
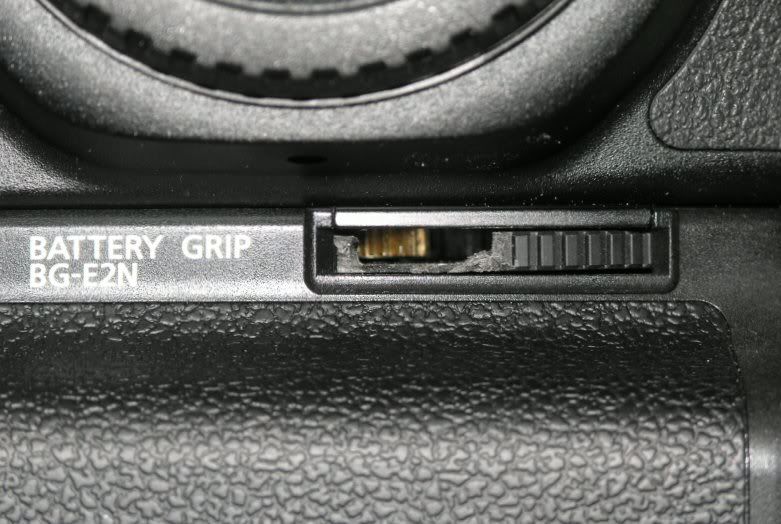
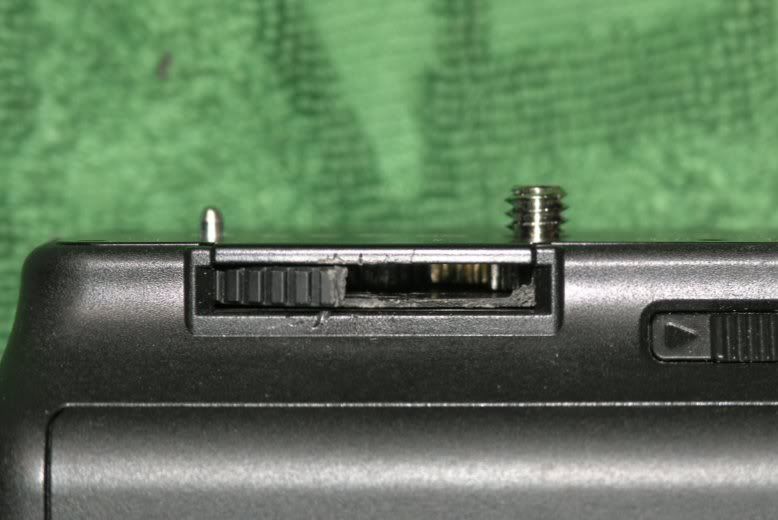
From what information I could find on the net it would seem that making a hole in the locking wheel was the best/ least destructive way of getting the grip off. :-\
I use a miniature pair of wire cutters and made a small hole in the wheel which exposed the metal gears inside the grip.
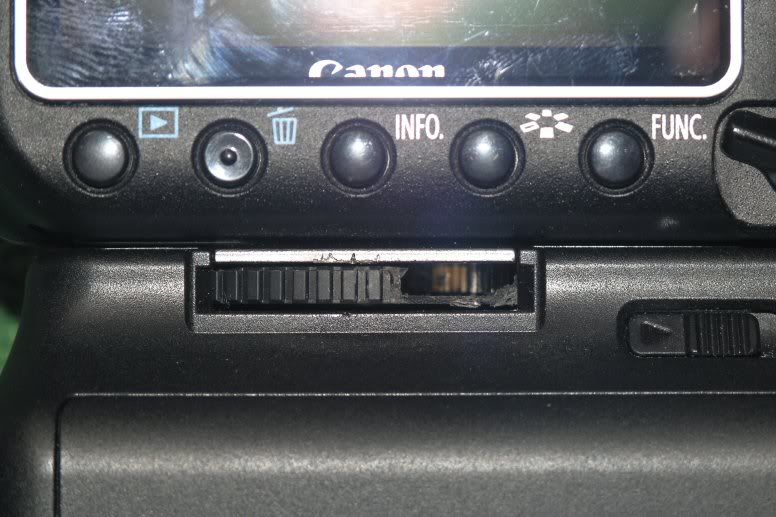
At first I tried to use a small screw driver to turn the gears within the grip but could not get the gearing to turn, a closer look revealed that some of the plastic gears teeth had gotten stuck within the metal gears.
Once I had cleaned out the gears with a needle I was able to turn the gears and remove the grip easily with a small screw driver.
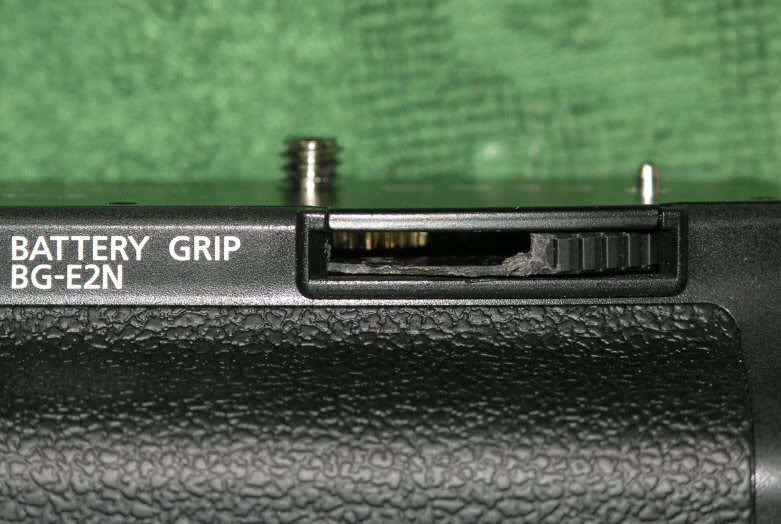
Now that the grip was off I could relax.... a little, I still needed to see the what was damaged and if it could be repaired.
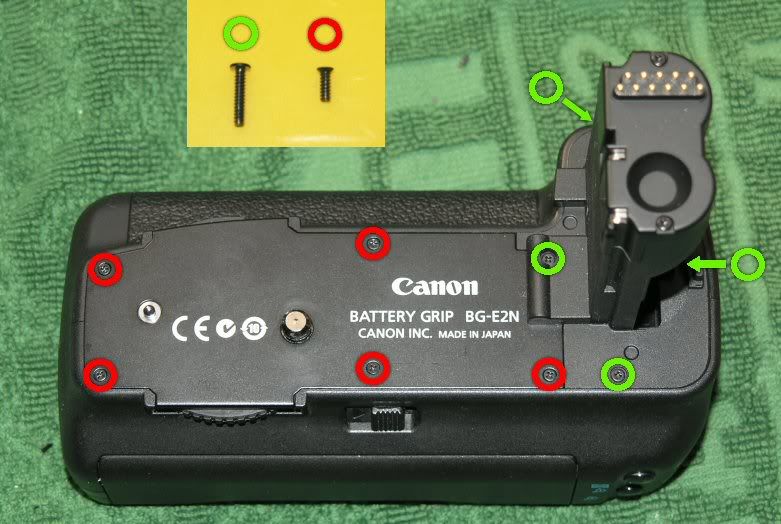
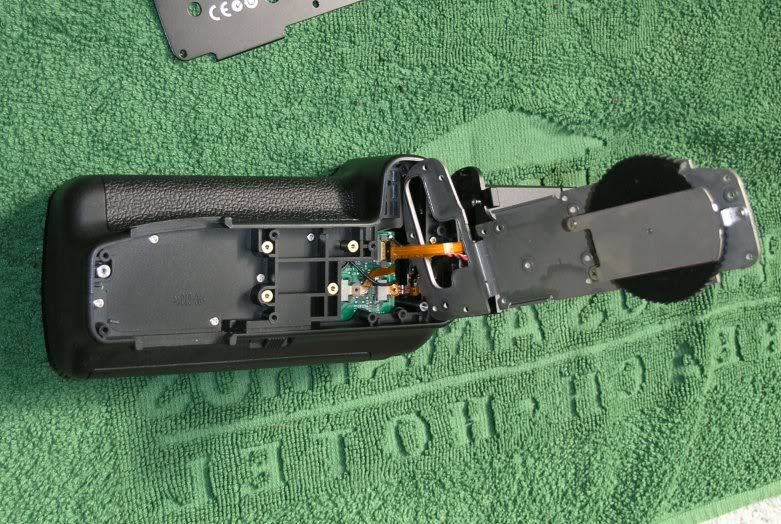
The first thing that needed to be removed was a cover plate at the top of the grip which was held on by 5 short screws and 4 long screws.
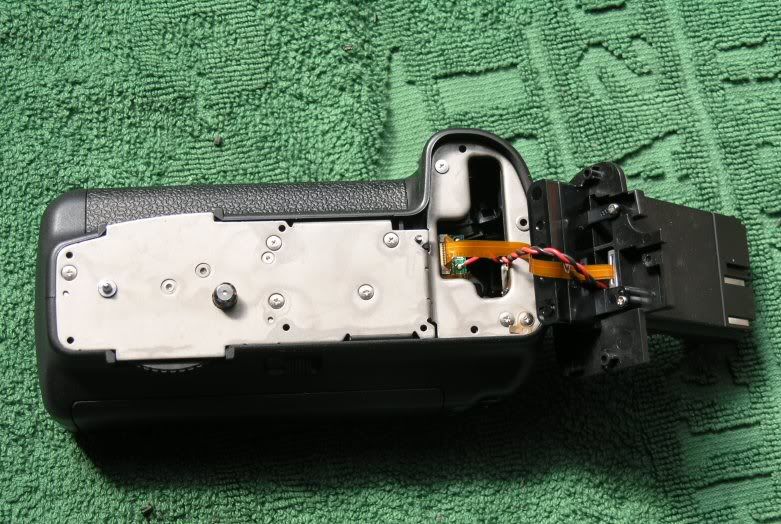
Once the cover plate was removed the Dial assembly was exposed (part # CY1-4313-000)
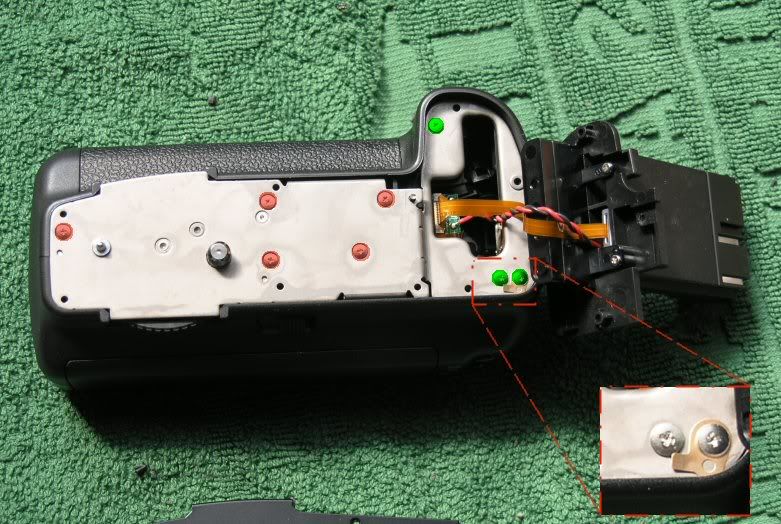
There are 8 screws holding dial assembly to the grip, 5 which screw into brass and 3 of which have slightly thicker threads as they screw into plastic.
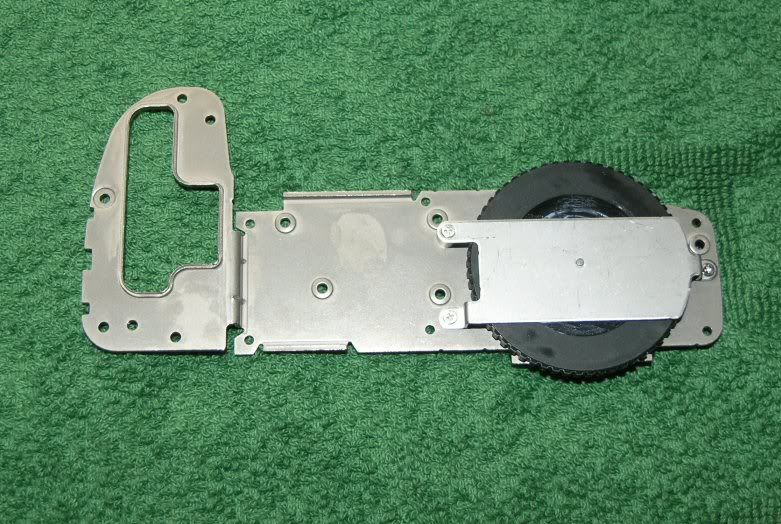
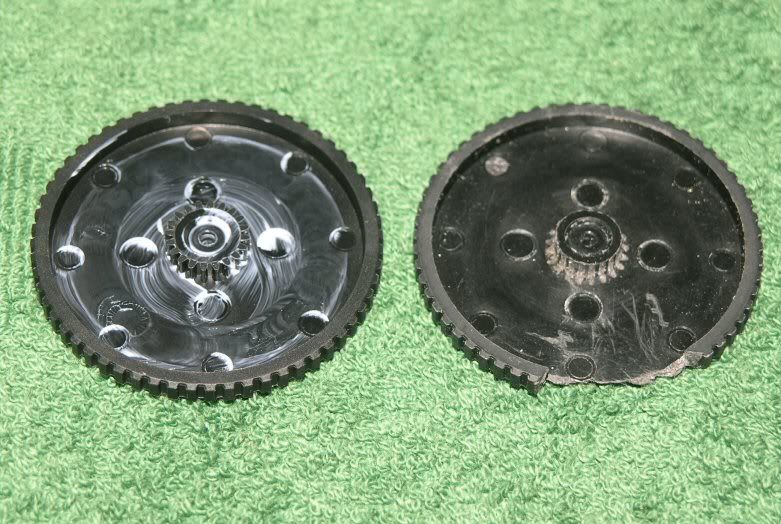
With the dial assembly unscrewed I was able to access the plastic wheel by removing a small plate that held it in place.

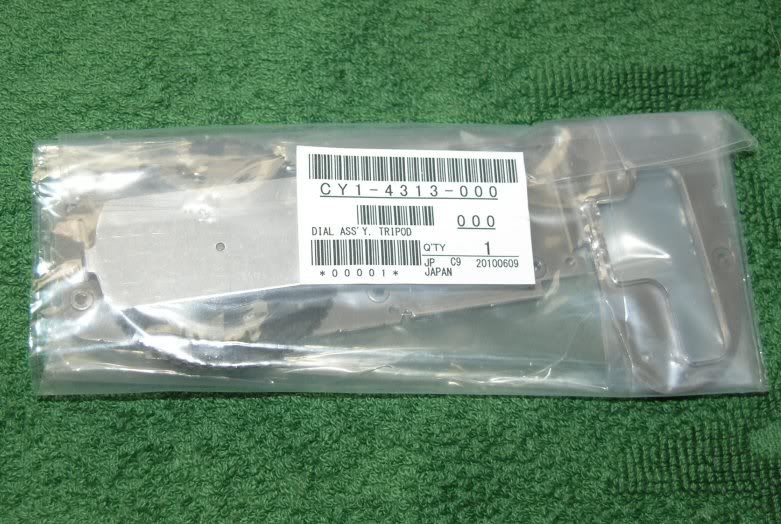
In the ideal world I would have been able to purchase just the plastic dial but Canon only sale the whole dial assembly......
Searched the net and the only place I could find that sold the part was USCamera http://www.uscamera.com/index.htm
Ordered the part for $36.13 USD which converted to £22.64 GBP. It was delivered within 2 weeks, great service from USCamera.com! 8)
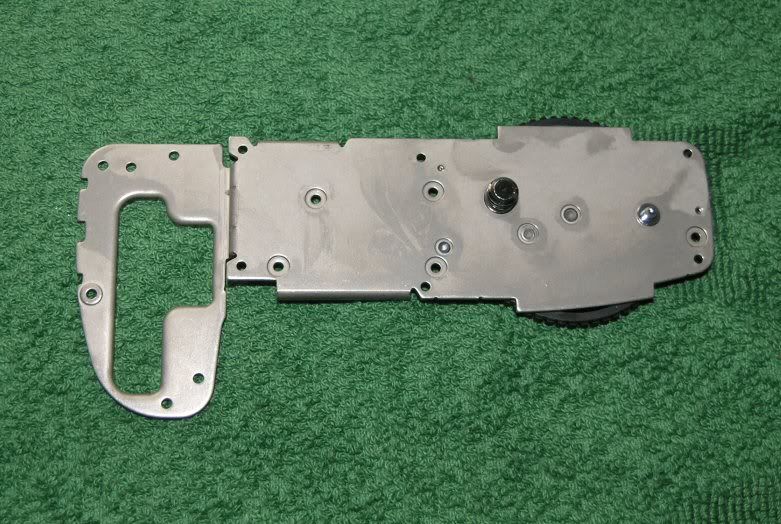
I was planning on removing the dial from the new assembly and fitting it to the old assembly to save time, but I noticed that when I had used a screwdriver to remove the grip I had made some small but noticeable scratches on the original gearing that might damage the new dial.
I decided to fit the whole new assembly just in case, which unfortunately meant that I would have un-solder/ re-solder the power cables that pass through a hole in the dial assembly. There is also a small ribbon cable that passed through it but could be unplugged.
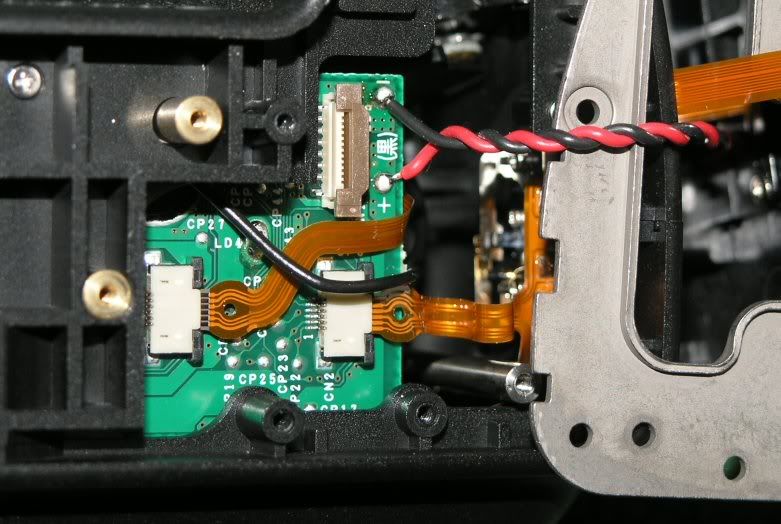
Had to be very careful when using the soldering iron on the power cables as the was little play with the cables and there was a ribbon cable close by....... :-\
Once the soldering was done it was just a case of reassembling the grip and attaching it to my camera for testing, although I didn’t tighten the dial too much this time....
The Canon grip is a well made piece of kit it just a shame that the silly plastic dial lets it down.... :'(
If I had to do it again I would make sure I used some tape over the end of the screw driver or used a wooden matchstick to turn the gears, this would have prevented the damage to the gears and would have save the cable soldering, oh well you live and learn...... :
Disclaimer: this article is only intended for general information purposes only and does not constitute advice or substitute advice of an appropriately qualified professional
It would seem that over time I had been over tightening the dial lock and had manage to strip the plastic gears from it. :-[
I did a search on the net and found it to be a common problem with canon grips, although information on getting the grip off was not so common.....
The following is break down of how I got it off and repaired for minimal costs
Disclaimer: this article is only intended for general information purposes only and does not constitute advice or substitute advice of an appropriately qualified professional
From what information I could find on the net it would seem that making a hole in the locking wheel was the best/ least destructive way of getting the grip off. :-\
I use a miniature pair of wire cutters and made a small hole in the wheel which exposed the metal gears inside the grip.
At first I tried to use a small screw driver to turn the gears within the grip but could not get the gearing to turn, a closer look revealed that some of the plastic gears teeth had gotten stuck within the metal gears.
Once I had cleaned out the gears with a needle I was able to turn the gears and remove the grip easily with a small screw driver.
Now that the grip was off I could relax.... a little, I still needed to see the what was damaged and if it could be repaired.
The first thing that needed to be removed was a cover plate at the top of the grip which was held on by 5 short screws and 4 long screws.
Once the cover plate was removed the Dial assembly was exposed (part # CY1-4313-000)
There are 8 screws holding dial assembly to the grip, 5 which screw into brass and 3 of which have slightly thicker threads as they screw into plastic.
With the dial assembly unscrewed I was able to access the plastic wheel by removing a small plate that held it in place.
In the ideal world I would have been able to purchase just the plastic dial but Canon only sale the whole dial assembly.....
.Searched the net and the only place I could find that sold the part was USCamera http://www.uscamera.com/index.htm
Ordered the part for $36.13 USD which converted to £22.64 GBP. It was delivered within 2 weeks, great service from USCamera.com! 8)
I was planning on removing the dial from the new assembly and fitting it to the old assembly to save time, but I noticed that when I had used a screwdriver to remove the grip I had made some small but noticeable scratches on the original gearing that might damage the new dial.
I decided to fit the whole new assembly just in case, which unfortunately meant that I would have un-solder/ re-solder the power cables that pass through a hole in the dial assembly. There is also a small ribbon cable that passed through it but could be unplugged.
Had to be very careful when using the soldering iron on the power cables as the was little play with the cables and there was a ribbon cable close by....... :-\
Once the soldering was done it was just a case of reassembling the grip and attaching it to my camera for testing, although I didn’t tighten the dial too much this time....
The Canon grip is a well made piece of kit it just a shame that the silly plastic dial lets it down.... :'(
If I had to do it again I would make sure I used some tape over the end of the screw driver or used a wooden matchstick to turn the gears, this would have prevented the damage to the gears and would have save the cable soldering, oh well you live and learn...... :
Disclaimer: this article is only intended for general information purposes only and does not constitute advice or substitute advice of an appropriately qualified professional