Hi,
I do some nightphotography on my 5D3. It is still amateurish because one always can improve.
After having seen this tutoring video
Curves and Levels - Easy 123 - Photoshop Astrophotography Tutorial
I am keen to do this myself. It is about curves and levels in Photoshop to enhance the data. My version is CS 2.
But there arise a few questions:
I downloaded deep sky stacker. stacked seven colour pictures: copies of the same photograph to give it a try.
This guy in the video starts with a greyscaled stacked picture. Others I've seen worked at RGB mode.
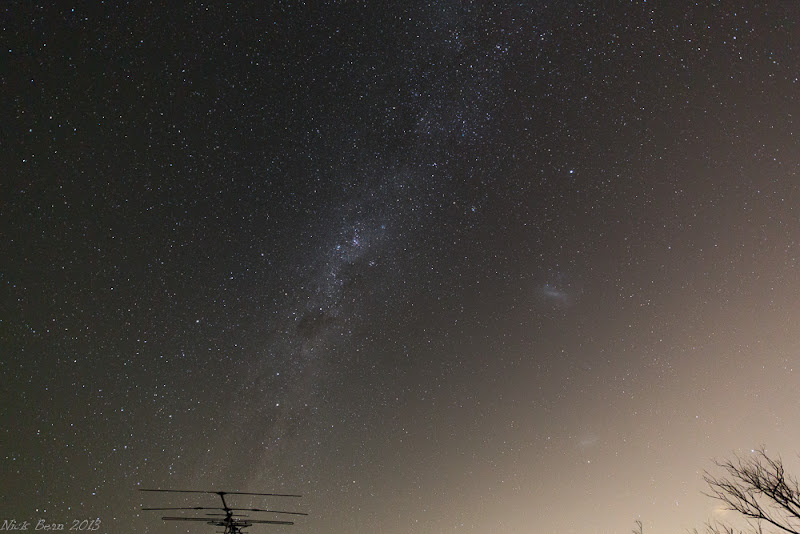
How is he getting a greyscale type of stacked photographs as mine turned out to be colour? It never looked like his in the beginning. Here's my slightly enhanced original picture

Z96A3724bMASTER by Peter Hauri, on Flickr
I guess it kinda deals with RGB channels. But I have no clue how to do it, even my curves and levels don't react the same way as his.
Is it a presetting in PS which he applied without mentioning it?
How can I do it in CS 2?
Thanks for any technical help.
Just another question: at what ISOs are you taking nightsky photographs for stacking purposes?
I currently take them applying 600 rule at ISO 6400 to 12800, f/8 with a 16-35 USM II lens.
Cheers and thanks in advance, Peter
I do some nightphotography on my 5D3. It is still amateurish because one always can improve.
After having seen this tutoring video
Curves and Levels - Easy 123 - Photoshop Astrophotography Tutorial
I am keen to do this myself. It is about curves and levels in Photoshop to enhance the data. My version is CS 2.
But there arise a few questions:
I downloaded deep sky stacker. stacked seven colour pictures: copies of the same photograph to give it a try.
This guy in the video starts with a greyscaled stacked picture. Others I've seen worked at RGB mode.
How is he getting a greyscale type of stacked photographs as mine turned out to be colour? It never looked like his in the beginning. Here's my slightly enhanced original picture
Z96A3724bMASTER by Peter Hauri, on Flickr
I guess it kinda deals with RGB channels. But I have no clue how to do it, even my curves and levels don't react the same way as his.
Is it a presetting in PS which he applied without mentioning it?
How can I do it in CS 2?
Thanks for any technical help.
Just another question: at what ISOs are you taking nightsky photographs for stacking purposes?
I currently take them applying 600 rule at ISO 6400 to 12800, f/8 with a 16-35 USM II lens.
Cheers and thanks in advance, Peter
")