240408 solar eclipse (totality)

RaPhoto

Ra R5 R7 R8
CR Pro
Sep 4, 2020
32
157
After arriving home from a round trip of 4500miles by car I can finally start processing my solar eclipse photos in earnest.

First up are a couple of frame grabs from my R8+RF10-20mm 4k movie.
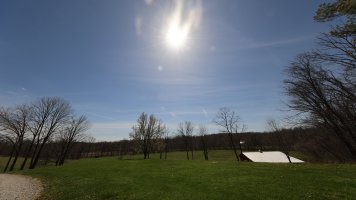
Photo 1 - Note the light cloud cover which was a vast improvement from the day before and after when we had pouring rain. About 10min prior to totality.
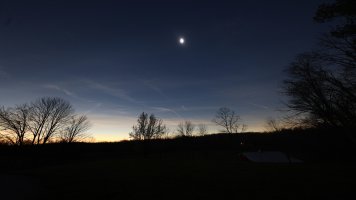
Photo 2 - Totality! Note Jupiter in the lower right from the sun. The temperature dropped about 10 degrees F from the start of the eclipse to totality.

What's cool about doing a movie with scuzzy skies during an eclipse is watching the Moon's shadow crossing the sky. We couldn't observe this phenomenon in 2017 on the Oregon/Idaho border with perfect skies.R8 10mm Partial copy.jpgR8 10mm Total copy.jpg
 
  • Like
Reactions: 4 users
Upvote 0
Aug 10, 2021
1,897
1,690
After arriving home from a round trip of 4500miles by car I can finally start processing my solar eclipse photos in earnest.

First up are a couple of frame grabs from my R8+RF10-20mm 4k movie.
Photo 1 - Note the light cloud cover which was a vast improvement from the day before and after when we had pouring rain. About 10min prior to totality.
Photo 2 - Totality! Note Jupiter in the lower right from the sun. The temperature dropped about 10 degrees F from the start of the eclipse to totality.

What's cool about doing a movie with scuzzy skies during an eclipse is watching the Moon's shadow crossing the sky. We couldn't observe this phenomenon in 2017 on the Oregon/Idaho border with perfect skies.View attachment 216142View attachment 216143
It's great you were able to show Jupiter! I had read there was a small chance of a comet 12P/Pons-Brooks, but it looks like that didn't happen.
 
Upvote 0

RaPhoto

Ra R5 R7 R8
CR Pro
Sep 4, 2020
32
157
Part 2. My 2nd rig for the eclipse was my R7+RF200-800 at 800mm. I used this rig to get the best solar photosphere detail during the eclipse phase and chromosphere prominences during totality

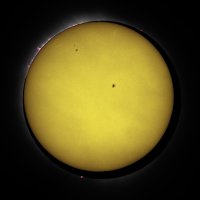
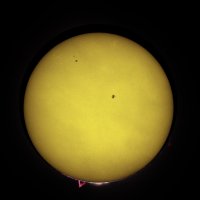
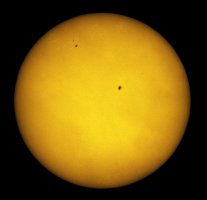
Photo 1 is my reference full disk solar image taken at the end of the eclipse. (Note: Original white light image modified to enhance faculae and granulation detailed with color palette change). Large scale surface inhomogeneities are due to wispy clouds. Very happy with detail from this single image (I usually stack ~100 images when doing solar imaging).
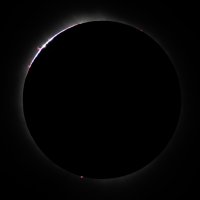
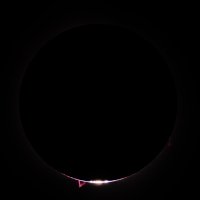
Photos 2 and 3 are from the initial and final phase of totality. Bailey's beads are evident. The moon's larger angular size is only allowing the largest prominence to peak through at the bottom of photo 2.
Photos 4 and 5 superimpose the full disk image at its approximate location behind the lunar shadow. The lack of symmetry of the exit points shows that we were not at the exact center of totality.


SolEclSS2024 CR7_2775.jpgSunEcl BB 1st crop CR7_080436 copy.jpgSunEcl BB crop CR7_080996 copy.jpgSunEcl BB 1st crop w sun CR7_080436 copy.jpgSunEcl BB final w Sun crop CR7_080996 copy.jpg
 
  • Like
  • Wow
Reactions: 5 users
Upvote 0

RaPhoto

Ra R5 R7 R8
CR Pro
Sep 4, 2020
32
157
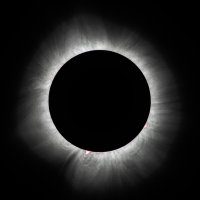
Part 3. My 3rd rig for the eclipse was my R5+RF100-500 at 500mm. I used this rig to get the best extended corona detail during totality.

Photo 1. Is the corona as opened in ACR.
Photo 2. The same image is processed with some HDR magic to bring out details of magnetic field lines and loops.
Photo 3. Close up of corona using rig 2 (R7+200-800mm) as opened in ACR.
Photo 4. Same image as in 3. but again, with HDR processing to show off some cool structures in the near Corona and Chromosphere.Corona PS  crop CR5_168868 copy.jpgCorona HDR PS  crop CR5_168868 copy.jpgCorona PS crop sm CR7_080768 copy.jpgCorona HDR PS crop sm CR7_080768 copy.jpg
 
  • Like
Reactions: 2 users
Upvote 0