Input on macro flashes (Canon MR-14EX / MT-24EX)

Status
Not open for further replies.
L

Lux314

Guest
Hello all,

a question from a newbie poster on this forum - and I'm trying here to avoid the 'unofficial' FAQ's listed recently by WildBill... :)

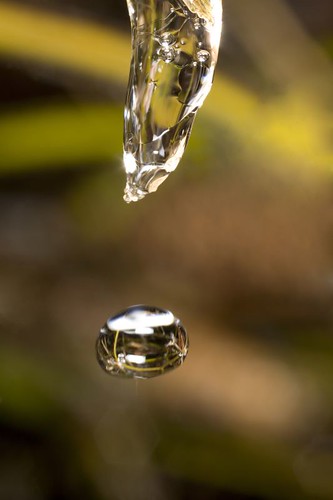
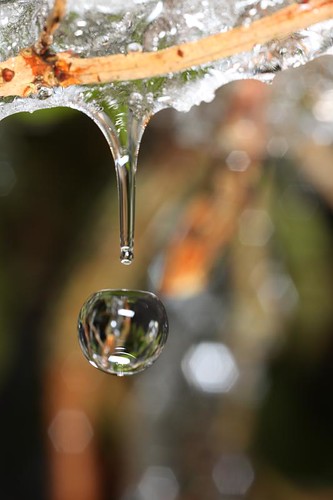
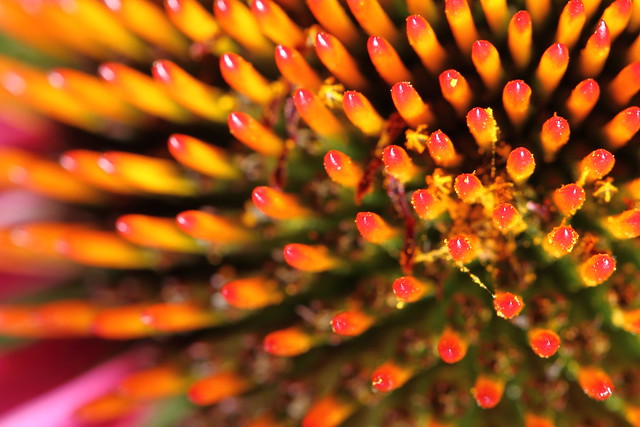
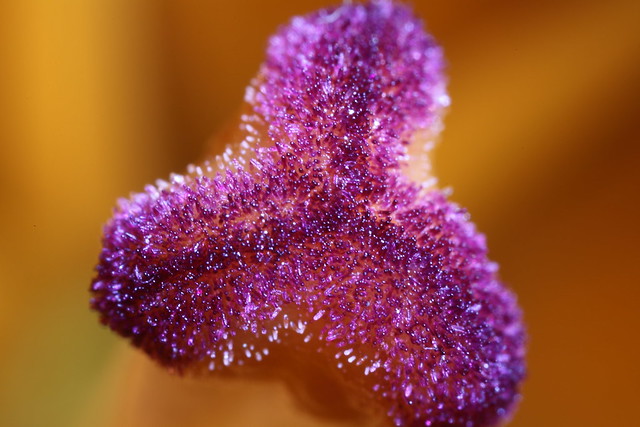
I'm looking for input on flash units for macro photography, and especially if you have experience with the Canon MR-14EX versus MT-24EX: e.g. any pros and cons of both regarding their possibilities and limitations in use (besides the evident difference in guide number of course), any issues seen with the 2 flash units versus the ring-type flash (thinking e.g. about how reflections from the flashes show in the pictures), cumbersome set-up / operation, reliability, ... Any help and input is welcome!

In case it might be relevant: intented usage is with an EF 100 mm 2.8 L IS, and in the future probably also with a MP-E 65 mm 1-5x lens.

Thanks a lot!
 
I use my MT-24EX almost always with my MP-E 65 and occasionally with my 100/2.8 IS. Personally, I far prefer the MT-24EX over the MR-14EX. With the two flash heads you have far more possiblities and I find the results from the MR-14EX to look a bit flat. While I must admit I have never used the MR-14EX myself, I would suspect it is an easier flash for those getting into macro photography. While I do prefer the MT-24EX, you'll likely mess up a number of shots before really getting the hang of it.

The following may also help.

- I'm sure you already know, but you'll need an adapter to get it to work with the 100/2.8.
- For all practical purposes you'll need to diffuse the heads of the MT-24EX. I use Stofen diffusers though you can certainly make your own.
- Canon makes a specialty head for the MP-E 65 + MT-24EX that prevents some light from reflecting into the lens. I highly recommend it.
- Some subjects will be tricky with reflecting light. I have a pair of Wimberley macro brackets I use for especially tricky subjects - in particular water drops and some beetles.

That being said, I almost never use the MT-24EX with my 100/2.8 IS. Most of my subjects with that lens are flowers and small objects that tend to look worse with flash. For those subjects I stick to ambient light. For insects the MT-24EX is great in providing detail of the eyes and body.

Here is an example shot with the MP-E 65 + MT-24EX.
6046280004_54e5e0a8cd.jpg

http://www.flickr.com/photos/calevphoto/6046280004/

Here's an example showing the issue you can run into with reflections on some surfaces
2197050103_4fbb293ab0.jpg

http://www.flickr.com/photos/kirispupis/2197050103/

Here's an example where I fixed it using the Wimberley macro brackets (reflections still there but now easily removable with content aware fill)
3130457506_a44979de40.jpg

http://www.flickr.com/photos/kirispupis/3130457506/

Here's the 100/2.8 with the MT-24EX. I was too lazy at the time to attach the Wimberley brackets.
4.jpg

http://500px.com/photo/4354171

Finally, depending on your macro subject you may not need a macro flash at all. This one used two 580EX's. I use this setup for high speed photos.
4.jpg

http://500px.com/photo/4227516
 
Upvote 0
Jul 21, 2010
31,221
13,083
The main advantage of the MT-24EX is the flexibility of being able to position the heads wherever you want them. The MR-14EX is ideal for 'documentary' images - relatively shadow-free macro shots. Although you can ratio the two heads with the MR-14EX, you still get flatter, less dimensional lighting.

Also, if you get the MP-E 65mm, the MT-24EX is the ideal flash for that lens. The MR-14EX actually projects light a little too far from the lens (behind the subject) and since it cannot be adjusted, it's suboptimal for the MP-E 65mm at higher magnifications (shorter working distances).

Next question - do you have a Speedlite, e.g. 430EX II or 580EX II. If so, you can combine that with an off-camera shoe cord (Canon OC-E3 or cheaper 3rd party alternative) and a flash bracket like the Manfrotto 233B, and position the flash right near the end of the macro lens. This works quite well with the 100L Macro, for example. Here's a shot with that setup:


EOS 7D, EF 100mm f/2.8L Macro IS USM, 1/60 s, f/8, ISO 400, 430EX II on Manfrotto 233B flash bracket via OC-E3

If you've got the camera on a tripod, you can also handhold the flash on the off-camera cord. Here's an example of that:


EOS 7D, EF 100mm f/2.8L Macro IS USM, 1/40 s, f/8, ISO 100, handheld 430EX II via OC-E3

If/when you get the MP-E 65mm, you'll really want the MT-24EX. Can you live without it? Yes:


EOS 5D Mark II, MP-E 65mm f/2.8 1-5x Macro @ 4x, 0.8 s, f/10, ISO 200

During that 0.8 s exposure, I 'painted' the subject with a handheld LED flashlight (one of the big, bright 3 D-cell Maglites)

But the MT-24EX opens up a lot more possibilities, including the exposures you'll need to shoot outside, where even a mild breeze can ruin a shot with subject motion.

Here are a couple of examples I've posted previously with the twin flash (I also use the Sto-Fen diffusers on the heads):


EOS 5D Mark II, MP-E 65mm f/2.8 1-5x Macro @ 5x, 1/60 s, f/11, ISO 400, MT-24EX


EOS 5D Mark II, MP-E 65mm f/2.8 1-5x Macro @ 4x, 1/60 s, f/11, ISO 400, MT-24EX
 
Upvote 0
L

Lux314

Guest
Thanks a lot, kirispupis and Neuro, for your very helpful input on this, and for taking the time to write this up clearly, and even illustrate with these inspiring pictures!!! I think I got all the information that I was looking for :)

As for the Speedlite - yes, I do have one (a 550EX actually, I must be one of the few people to own one of those), and I was indeed planning to start using it with an off-camera shoe cord for the 100 mm macro. But I was also looking into buying a dedicated macro flash, to go with the MP-E 65 mm later on, as this would bring me much more flexibility. And I think I even can use the 550EX as a slave for the MT-24EX, so that would also come in handy.

Again, thanks for your comments!
 
Upvote 0
Jul 21, 2010
31,221
13,083
Lux314 said:
And I think I even can use the 550EX as a slave for the MT-24EX, so that would also come in handy.

You can, indeed. Narrow aperture (for more DoF) and a fast shutter speed with a brightly lit subject often results in a dark or even pitch-black background. You can use the Speedlite on a small stand as a slave flash to light the background, if desired.
 
Upvote 0
C

cgardner

Guest
Because I only occasionally dapple with macro and already have a pair of 580ex flashes I didn't want to invest in a dedicated macro flashes. I teach lighting and devised DYI modifiers for my speedlights so I devised a DIY modifier which allows me to light macros very naturally with my existing flashes. See: http://photo.nova.org/MacroDiffuser/

Natural light has an overhead, downward, 45° modeling component. Our perceptual "looks normal" baseline is formed by constantly seeing objects lit from that angle.

The MR-14 used by itself creates flat unnatural light. The origin of ring flashes that attach to the lens like the MR-14 was medical documentation where shadowless light was desired and camera and flash needed to be enclosed in a sterile drape. That's not the ideal lighting for realistically modeling 3D objects. It is however ideal for adding flat even fill in the small space between the lens and macro subject in tight quarters. So the ideal application of the MR-14 is as fill and master with a second EX slave flash to the side or behind creating the modeling highlights.

My DIY diffuser performs a similar role to the MR-14, creating even fill at the end of the lens with a slightly downward angle which is actually more natural than flat fill because skylight fill comes from overhead all the time and there are always shadows under objects in natural light. It wouldn't work for very close in work, but with extension tubes or a 100mm macro where the gap between lens and subject is several inches it creates very natural looking downward modeling with just a single flash with enough "wrap" effect from the sides to soften the shadows. It works even better when combined with a slave flash placed behind and to the side of the object.

The convention of putting the key light 45°V and 45°H from the lens axis is a human thing resulting from the fact human faces have deep set eyes with a sun dial nose sitting between them. Putting the key light 45/45 from the point between the eyes is the ideal place for getting light in both eyes and modeling the 3D shape of the nose naturally by virtue of its shadow falling over 1/2 of it and not hanging out exaggerating it's size and shape.

But for nearly every other creature and object their 3D appearance in a 2D is better revealed by putting the dominant modeling source behind the object at about 135° from the camera with the shadow side illumination controlled via the fill intensity. It has to do with the fact in 2D photos we react and interpret shape based on contrast patterns, mentally matching the patterns will see in the photos to memories of seeing 3D objects in the natural baseline 45° downward angle from front, side, or back.

To see this take some 3D objects outdoors in sunlight at 10AM or 2PM when the sun is at 45° vertically and walk around them 360° taking photos every 15° and note where the sun is relative to the objects when the modeling looks most natural in the photo. Do that exercise and you should realize that lighting an earwig naturally isn't any different that lighting an elephant. The same angle of downward sun "key" lighting and predominantly downward sky fill hits both. To duplicate that natural lighting with flash you'll need to keep the key light 45° above and 45° behind the subject.

The MR-24 which creates crossed lighting isn't ideal for 3D rendering either. Crossing lights at 45° is another strategy for getting flat even lighting for tasks like copying flat art work. That's the angle lights on copy cameras are placed to eliminate reflections and how background lights are placed light one evenly. More natural lighting with the MR-24 would be obtained by using a bracket that positions one flash behind the object as rim light and the other close to the lens axis.

Whether the subject is human or bug there is an ingrained instinct to make eye contact. The crossed configuration works very nicely for bugs with bulging eyes because it creates symmetrical mirror-image catchlights on the eyes. The overall lighting on the bug will not be as natural as with the rim-light / even fill strategy but with huge balls filling the frame as the focal point that's a less important goal.

As with lighting anything there are no one-size-fits-all solutions for lighting. So you would need to light bugs differently than your coin collection and might want to light both two different ways depending on the context of the background. If you are shooting a wide shot of the bug in its natural setting you'd want the more natural rim-light / even fill strategy. But for a close-up of it's scary face a crossed frontal scenario to get the symmetrical catchlights with a third flash from behind to rim light the body would be more ideal. For coins you might want flat lighting for some shots and strong side lighting with even fill for others. If shooting toy soldiers you'd want the same key and fill angles you's use for life person. So the ideal set of lighting tools are the one that will allow you to perform the most different tasks for the least amount of money :)
 
Upvote 0
Status
Not open for further replies.