A monitor calibration tool is something I've always recommended to photographers, from hobbyists to professionals. I've always been a bit taken aback by how many photographers I've run into over the years that don't utilize a relatively inexpensive tool to get the most out of their monitors.

Full disclosure: Datacolor sent me a SpyderX Elite for free and they have been an active sponsor of Canon Rumors over the years.

Fuller disclosure: I am not a reviewer at the best of times, so this is an honest review of the feature(s) I use, and does not discuss every single feature available to you. I am not an expert on color science or printing. However, I do have eyes and matching my editing to third-party printing is very important to me.

I have been using Datacolor calibrators since the Spyder2 and I have always been impressed by their software and the performance of the calibration tools. I have always purchased or accepted each new version since the Spyder2.

This latest calibrator from Datacolor is their fastest and from what I can tell, the most accurate one I've used. I found the speed to be about 50% faster than the Spyder5 Elite I graduated from. However, since I only calibrate every month or so, speed isn't a huge deal for the home user, but it could matter for a studio or educational facility with many monitors to calibrate.

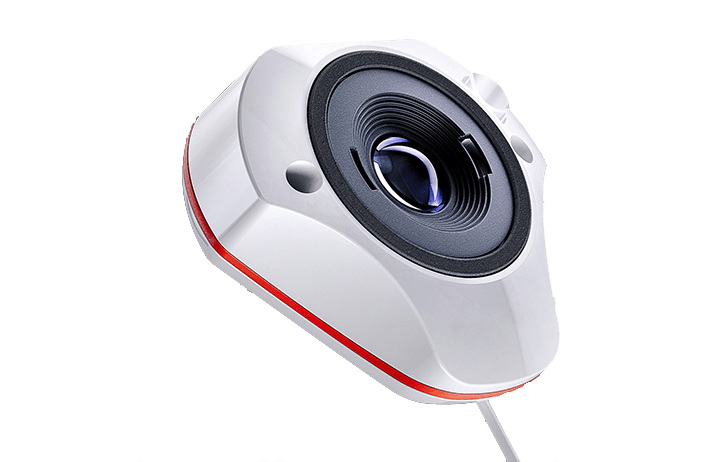
The SpyderX Elite has an all-new and larger lens-based system that Datacolor claims has increased accuracy and speed of calibration and we definitely see merits in both claims.

How easy is the process?

Layer 1 - Review: Datacolor SpyderX Elite Monitor Calibration Tool

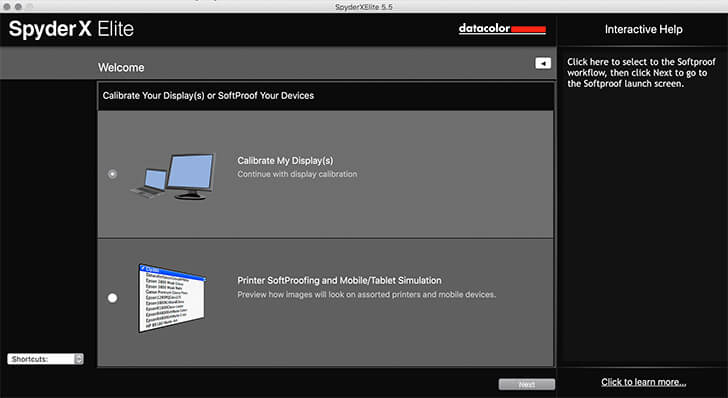
Step one: You simply select what you're wanting to do with the SpyderX Elite software. For the purpose of this review, we're only doing the “Calibrate My Display(s)” option.

Layer 2 - Review: Datacolor SpyderX Elite Monitor Calibration Tool

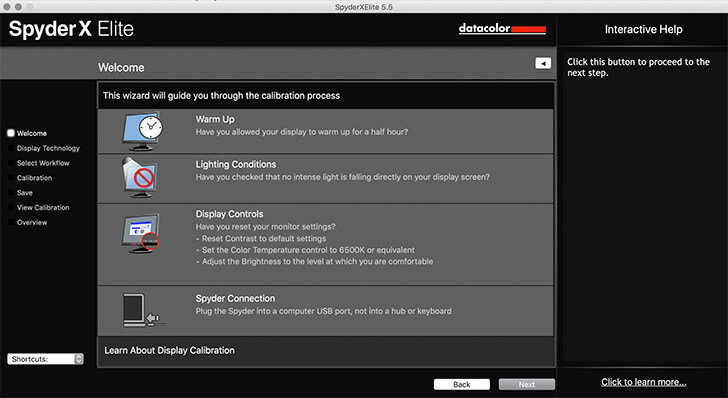
Step two: You're presented with a checklist on how to get the best out of the calibration.

Layer 3 - Review: Datacolor SpyderX Elite Monitor Calibration Tool

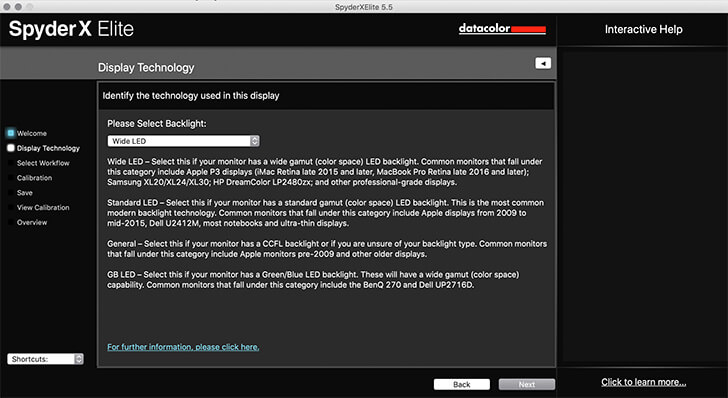
Step three: You need to select what sort of monitor you're going to be calibrating. There are some guidelines here to help you select the correct type of technology inside your monitor.

Layer 4 - Review: Datacolor SpyderX Elite Monitor Calibration Tool

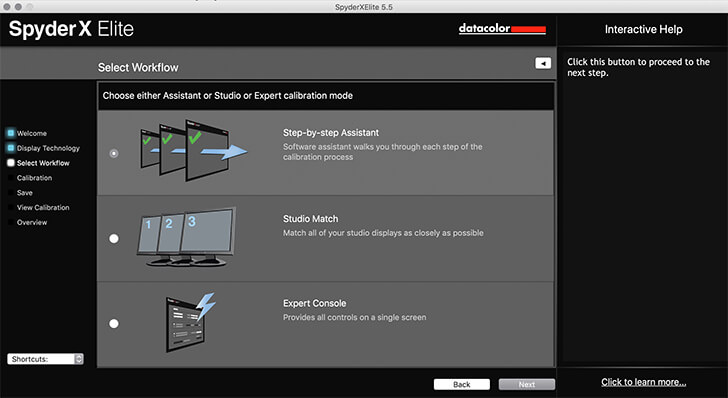
Step four: Select what sort of calibration workflow you want to use. In our case, we're doing the “step-by-step assistant”. The “Studio Match” will help you get multiple displays to look as close to the same as possible. The “Expert Console” is above my paygrade.

Layer 5 - Review: Datacolor SpyderX Elite Monitor Calibration Tool

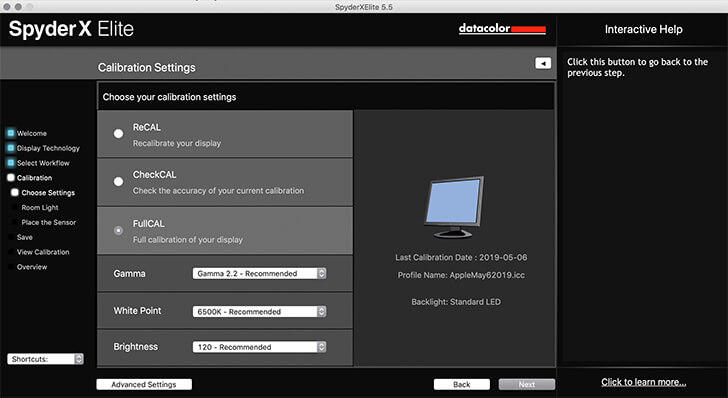
Step five: Select the calibration settings you want to use. I tend to always use the recommended settings with the FullCAL selected.

Layer 6 - Review: Datacolor SpyderX Elite Monitor Calibration Tool

Step six: The SpyderX Elite will now calibrate the ambient light around your monitor to help get the best calibration possible. Don't have any sort of direct artificial light or sunlight hitting the display, the software will let you know if your ambient light is too bright for best results.

Layer 7 - Review: Datacolor SpyderX Elite Monitor Calibration Tool

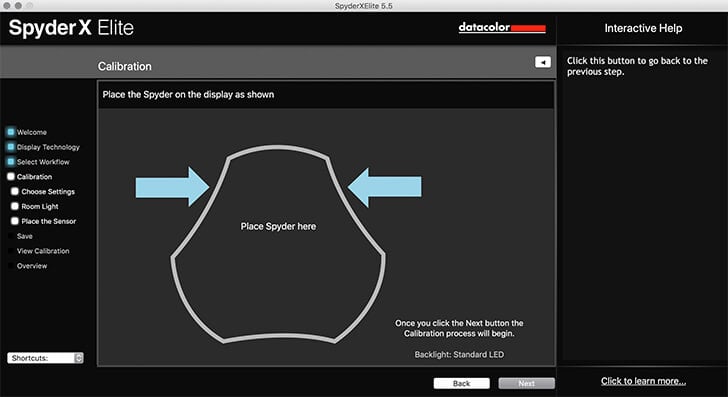
Step seven: Now it's time for the magic, take the base off your SpyderX Elite and place it on your monitor. I tend to have to tilt the screen on the 5k iMac to make it sit flush. The base plate used as a weight on the back of the screen to help keep the colorimeter in place.

Layer 14 - Review: Datacolor SpyderX Elite Monitor Calibration Tool

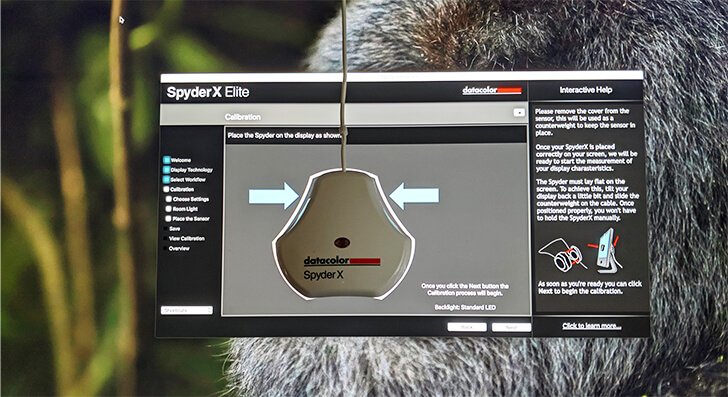
Step eight: Here's the SpyderX Elite ready to go.

Layer 15 - Review: Datacolor SpyderX Elite Monitor Calibration Tool

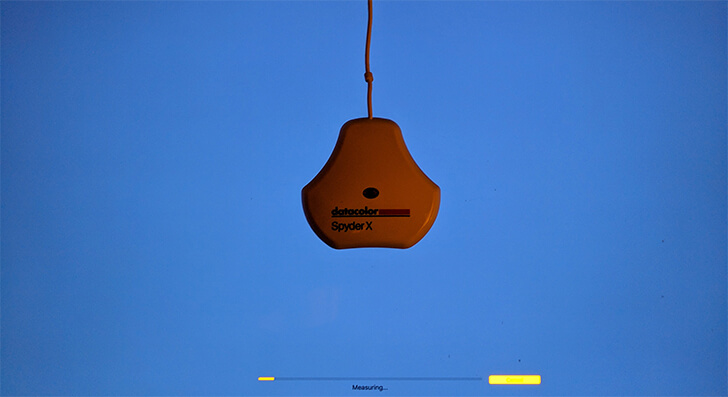
Step nine: The software now begins the calibration.

Layer 16 - Review: Datacolor SpyderX Elite Monitor Calibration Tool

Step ten: The calibration stops for some manual input. You need to set the brightness of the screen to match the target you selected earlier. You're supposed to set the brightness so it gets to within 4% of the brightness level you selected. On some monitors, this may be difficult, as there may not be enough steps of brightness to nail it. I just learned that on the 5K iMac, you can hold OPTION+SHIFT while raising and lowering the brightness in smaller increments (thanks MikeTCool).

Layer 8 - Review: Datacolor SpyderX Elite Monitor Calibration Tool

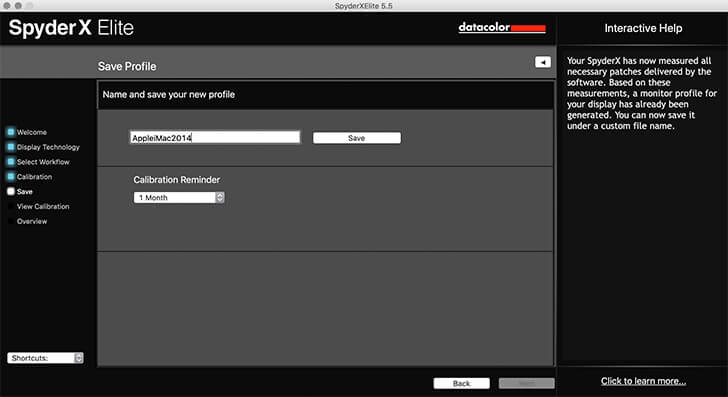
Step eleven: The calibration has been completed, now you need to name the calibration, press save and set your calibration reminder.

Layer 9 - Review: Datacolor SpyderX Elite Monitor Calibration Tool

Step twelve: You can check out what your screen looked like before and after calibration. You may be quite surprised about what you see if this is your first go at calibration.

Layer 10 - Review: Datacolor SpyderX Elite Monitor Calibration Tool

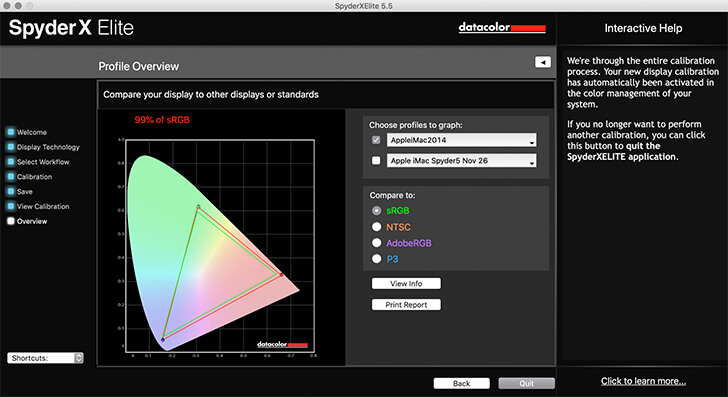
Step thirteen: There's a graph and some other options to compare different sorts of calibrations. This isn't something I get into, but that's the end of the process.

How long does this process take?

The first time you calibrate, it may be a bit clunky a you play around with settings and whatnot. However, once you've done it a couple of times, this whole process takes about 2 minutes from the moment you launch the software until you press “quit”. This may vary slightly computer to computer, but I found 2 minutes to be about the same across all of my computers.

Feature Comparison of the SpyderX Pro & SpyderX Elite

There are two versions of the SpyderX to choose from. I used the SpyderX Elite because that's what Datacolor sent me, but for my own personal needs, the SpyderX Pro would suit me just fine. If you are into video, use a projector, print at home or have multiple screens you want to match up, the SpyderX Elite is the device you want.

Features SpyderX Pro SpyderX Elite
SpyderX Device
Single Click & Wizard Calibration Capability
Multiple Monitor Support
Ambient Light Monitoring & Profile Switching
Before and After Calibration Review
Display Mapping & Analysis Tools Basic Advanced
Calibration Setting Choices 12 Unlimited
Expert Console Calibration
Video & Cinema Calibration Targets
Soft Proof of Print Results
Projector Calibration
Display Matching in Studio
Visual Fine Tuning for Side-by-Side Display Match

Printing

I don't print at home anymore, so I rely on a mail order service here in Canada. I tend to do metallic prints to save on frames and glass and to keep my images lightweight for easy wall mounting.

I have found that the SpyderX Elite calibration has provided results that I would consider more accurate than that of the Spyder5 Elite, as brightness/luminosity are more accurate, and the colour, especially the greens seem a bit more accurate. The difference isn't huge, but I did see it my test prints. This sort of accuracy improvement likely affects the decerning photographer more than anyone looking at your images, but I do know some of us really want accurate print results.

Conclusion

The SpyderX Elite is a worthwhile upgrade for all owners of previous Spyder calibration tools. The speed, accuracy and ease of use make it a no brainer for all levels of photographers.

If you're a photographer and currently don't use a colorimeter, it's time to start. The SpyderX is the quickest and easiest such tool that I've ever come across for performance and usability, you will not be disappointed.

It's up to you to decide if the SpyderX Pro or SpyderX Elite is the right tool for you based on features, but you're not going to go wrong with either.

Datacolor SpyderX Pro $169  | Datacolor SpyderX Elite $269

You can learn more about the SpyderX Pro and SpyderX Elite at the Datacolor web site here.

Some of our articles may include affiliate links. If you purchase through these links, we may earn an affiliate commission at no extra cost to you.

Go to discussion...

Share.

19 comments

  1. My friend, who knew a lot more than me when I reentered the hobby of photography spoke very negatively against these devices. As I came up to speed I rationalized that they made a lot of sense but it wasn't until I started using a second monitor that did match well at all, that I finally bought one. I'd never be without, now.

    Jack
  2. A lot of the reviews on Amazon say to ditch the software it comes with and use the screen reader with a package called DisplayCAL. Is there anything to that advice?
  3. A lot of the reviews on Amazon say to ditch the software it comes with and use the screen reader with a package called DisplayCAL. Is there anything to that advice?

    I've tried DisplayCAL out and it wasn't for me. I like how easy the Datacolor software is. Power users may prefer DisplayCAL though.
  4. A lot of the reviews on Amazon say to ditch the software it comes with and use the screen reader with a package called DisplayCAL. Is there anything to that advice?

    Ignore them. If your monitor supports hardware calibration, use the monitor tools. Otherwise use the software that comes with the device. If you buy one of the versions where the software is too limited, maybe (maybe) DisplayCAL could help.
  5. I use Spyder every month and its a must-have in my quiver of photography tools. If you're not calibrating your monitor, then you're not serious about photography in my opinion.
  6. I'm now interested - how often do you actually need to redo the calibration? What would happen in (for eg) the course of a month that would change the calibration? I'm also interested in the effect that the level of light in the room has - I take it from the review that you need to pretty carefully mange ambient light during the calibration process, but presumably the amount (and temperature) of the light you use would have an effect on your perception of colour on the monitor?
  7. how often do you actually need to redo the calibration?

    Depends on your requirements. It can go from every week for critical work to longer periods. Usually every month is good enough. What may change is the ageing of the display components, and other environmental changes that can lead to slightly different behaviors. You may only see small changes, or no changes at all, between calibrations.

    Ambient light is important, and some calibration devices can take it into account as well, and help you find the right amount of ambient light and monitor brightness.

    Not only its brightness and temperature, but also its CRI is very important (especiall now that in many countries many types of incandescent lamps can't be sold any longer). Walls and other nearby large objects can influence the ambient light color too.
  8. Unfortunately no Linux support.

    DisplayCAL will work for Linux. Still, Linux CMS is less mature than macOS and Windows. And many photo printers aren't even supported (but buying TurboPrint drivers).
  9. I
    DisplayCAL will work for Linux. Still, Linux CMS is less mature than macOS and Windows. And many photo printers aren't even supported (but buying TurboPrint drivers).

    Indeed, SpyderX is listed as supported by DisplayCAL. Thanks!

    Let's not discuss the maturity of Windows, please.
  10. I'm now interested - how often do you actually need to redo the calibration? What would happen in (for eg) the course of a month that would change the calibration? I'm also interested in the effect that the level of light in the room has - I take it from the review that you need to pretty carefully mange ambient light during the calibration process, but presumably the amount (and temperature) of the light you use would have an effect on your perception of colour on the monitor?

    Monitors do go dim over time. It's not much, but enough to affect the color temperature and hence, your photos.

    The room I do my photography work in has one small window which I keep the drapes closed most of the time and one single ceiling lamp that is not reflected anywhere on the monitor. This room is ideal as it is the same ambient late day or night so it's consistent. So the brightness on my monitor never changes.

    I can say by experience that in my earlier days, getting photos back from a print lab was always stressful because I never really knew how the colors would look compared to what I saw on my monitor. I had a few prints I had to reject because of this. The first time I calibrated my monitor was a moment of enlightenment. I never knew how off my monitor really was until after it was configured. I do a lot of semi-pro underwater photography for clients and have expensive prints done. Calibration is an absolute must when dealing with prints that can cost several hundred dollars.

    I recalibrate my monitor every month. To each their own. I have the Spyder Pro, but am considering upgrading to this new one if only because of the 2-minute calibration time. Mine takes about 15 minutes to do and I have two monitors so it's some time to do it.
  11. A lot of the reviews on Amazon say to ditch the software it comes with and use the screen reader with a package called DisplayCAL. Is there anything to that advice?

    I'd definitely go with DisplayCal... I compared profiles and color accuracy between the native Spyder color tools and DisplayCal, and DisplayCal was considerably more accurate.
  12. Well, I didn't know that, holy cow thank-you.

    You're super welcome! I specifically learned about that feature when having to color calibrate Mac displays in a video-editing lab, long long ago. It works with the volume keys as well!
  13. What you should know and I wish I did before purchasing..


    CIE DELTA E 2000SpyderX vs i1D3Spyder5 vs SpyderXSpyder5 vs i1D3
    Totalpeak = 2.009, avg = 0.717peak = 6.851, avg = 1.301peak = 8.147, avg = 1.378
    Worst 10%peak = 2.009, avg = 1.418peak = 6.851, avg = 3.315peak = 8.147, avg = 3.938
    Best 90%peak = 1.196, avg = 0.641peak = 2.135, avg = 1.077peak = 2.466, avg = 1.094

    "i1D3 (especially ColorMunki Display as direct competitor to the SpyderX) is still the best “bang for the buck” colorimeter at the current price point ($ 150-170 for ColorMunki Display, $ 170 for SpyderX). The SpyderX may become a choice, only for people on a tight budget, if and when its price falls considerably below that of the ColorMunki Display (or the latter increases in price)."

    I have tried SpyderX with included software (joke) and more recently with dpsplayCAL and failed to get results that are close to the published icc profiles for my panels at notebookcheck.com. Hence I don't recommend Spyder X for color sensitive applications.

Leave a comment

Please log in to your forum account to comment