How Would You Edit This Landscape Photo?

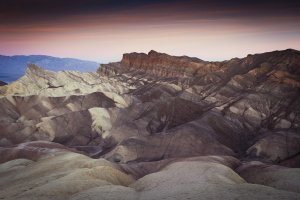
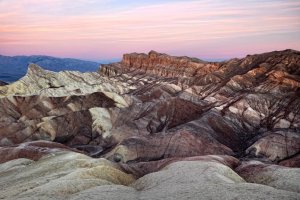
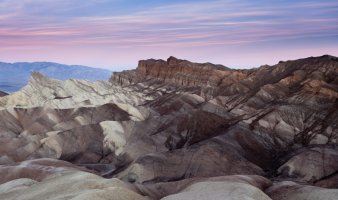
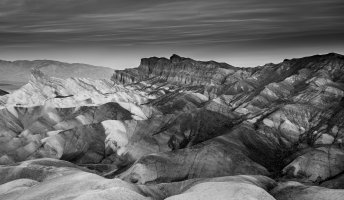
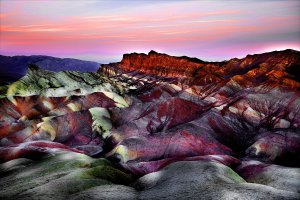
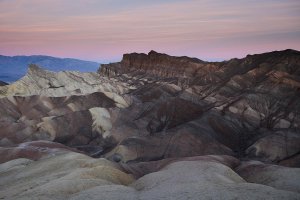
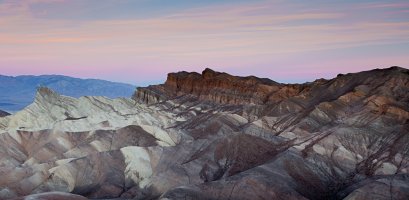
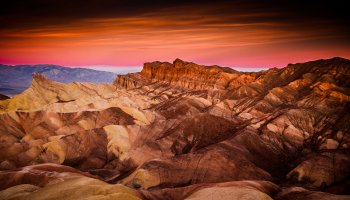
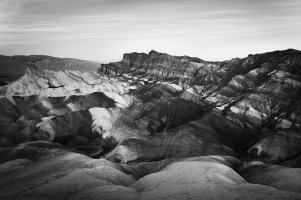
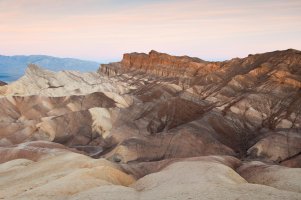
This is a photo I took at Zabriskie Point in Death Valley right before sunrise this past November. The link below is to download the RAW file from my Dropbox account. It's not an amazing picture, but I am curious to see different landscape editing techniques applied to this photo. Feel free to download the file and edit the picture as you normally would. Also, it would be great if you could post what program(s) and techniques you use to achieve the final result.

https://www.dropbox.com/s/b08zlbgbwfelyns/_MG_0452-1.cr2
 
I'll play...I gave it a panorama feel...

2q9lymf.jpg
 
Upvote 0
I had nothing else more important to do, so why not? ;)

First I applied LAB mode sharpening (Google it) in PS CS4. I then adjusted the tonal contrasts using Nik plugin, followed by a boost in saturation. I also applied some graduated neutral density filtering, once again using Nik. I did all this after first resizing.

_MG_0452-1_P.jpg
 
Upvote 0
I was there a few years ago, DV is really an astonishing place. I'd say how you edit depends on the feeling you want to convey to the reader. DV is many things, depending on the light. It can appear stark or full of life and beauty; it can appear desolate or rich; it can appear dead or full of life. You need to decide which of these you want to convey to your viewer.

When I was there it was full sun, though not direct. There was plenty of contrast and sky color. What I remember of this spot (and some others in DV) is the layers of detail: the sweep of the immense views, then the nearer-structure of the badlands and nearby mountains, and finally the personal-level detail of plants, pebbles and sand. Each scope had its own palette and texture. I could spend weeks photographing there.

What do you want this photo to say?
 
Upvote 0
This was fun - LR4:
Cropped and rotated about 1.5 degrees (wanted to make it 9:16, but thought that was cheating a bit)
-.45 Exp
+77 Contrast
-28 Highlights
+45 Shadows
-13 Blacks
+13 Clarity (plus added clarity and extras on the rocks with the local brush adjustments)
+15 Vibrance
+22 Saturation
A ton of color tone adjustments (mostly more red/orange I think)
+62 Sharpening
0 Noise reduction
Removed Lens distortion
Removed 1/3 of the vignetting
And actually applied a vert. distortion "correction" of -8 (no reason why, just liked it)

For the record, this is juiced way more than I would normally do, but it seemed it could take it.
 

Attachments

  • IMG_P1.jpg
    IMG_P1.jpg
    604.6 KB · Views: 3,902
Upvote 0
Fun project.... am here at work and only have LR4 to play with... Don't remember all the settings ... but here is my rendition:

Cropped bottom, Gradient in the sky, color bal, vignette, and bunch of HSL adjustments etc etc


Can send you snag it of the LR settings if you like it.
 

Attachments

  • _MG_0452-1.jpg
    _MG_0452-1.jpg
    1.9 MB · Views: 2,095
Upvote 0
Even I can do my first post here. This is my take. I used Camera Raw for basic conversion and then I used a lot of adjustment layers in Photoshop to convert it to b&w. I had to go back to CR sometimes to use the adjustment brush there. Hope you like it.
 

Attachments

  • _MG_0452-1 as Smart Object-1.jpg
    _MG_0452-1 as Smart Object-1.jpg
    483.5 KB · Views: 1,849
Upvote 0