This lens has become my favorite. I use a 5d classic with good effect. At first, I was seduced by the live view on my 7d, but then, I started learning how to set up for a shot with the viewfinder.
The tables that you've found elsewhere are a god send. Commit those to memory. I agree that if you are trying to use the camera in the classic sense that very little tilt is necessary. In that case, you may tilt the lens at such a small amount that you almost can't get there. 1/2 degree is ideal.
However, if you want to do the special effects, such as the centerline of a road, you will tilt the lens all the way and then set up about 8 inches above the road surface. In these cases, it is advisable to pre-focus. Again, I'm doing this with a 5dC so the focusing is done through the viewfinder. Following these instructions, it is possible to get the focal plane to project almost straight out from the camera. In fact, you can have the plane parallel to the straight view but offset by a few inches or feet.
How to focus so easily? First, note that the fixed point (about 8 inches from the centerline of the lens) doesn't move with focusing. This is the easy part. Now, when you turn the focus ring, all you're doing is rotating the plane of focus about that fixed point (it's really a line, but point is easier to visualize). Look at your distant targets. Then, rotate the focal plane until they are in focus.
For example, if you have the fixed point below the lens, you will move the distant focus up and down. You can see that in this photo:
 warning
 by
Stealth Tramp, on Flickr
Then, if you have the fixed point to the side of then, you can move the distant focus left and right. That is visible in this photo:
 Lowe Boat
 by
Stealth Tramp, on Flickr
On the other hand, I hooked my lens to a SpeedBooster and Sony NEX-5 and found out that I could do in about three seconds, what usually takes 5 minutes with the 5dC.
 Jag
Jag by
Stealth Tramp, on Flickr



 ) to get all the shots I want of our 12-month-old toddler indoors. Its tough to predict where and when he is going to move! So, I'm looking hard at acquiring a 24-70 2.8. I can use primes for other indoor shots of the older kids, but they are not working with the youngest right now.


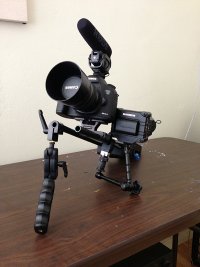


 5D III is a great camera for many of us. Great IQ + awseome AF system ;D